
15 Clever Kitchen Storage Upgrades for a Calmer, Clutter-Free Kitchen
Most kitchens are not short of cupboards. They are short of cupboards you can actually reach into without crouching, digging, and pulling out five things to find one. The spice you know you bought last month is behind the tall jars, the baking tray you need is under a stack, and the counter stays crowded because the toaster has nowhere sensible to live. These kitchen storage upgrades are picked for that everyday friction, not for a full remodel, and most of them fit into the kitchen you already have.
Before you buy anything, walk into the kitchen and notice the one cabinet you avoid opening. That cabinet is your starting point, not the prettiest drawer on a shopping list. Measure its inside width, depth, and height, check how the door swings, and buy for that one zone first. Two or three well-chosen upgrades, kept tidy with one clear home per item, will calm a kitchen far more than a trolley full of organizers that do not fit.
Pantry and Dry Goods That Stop Hiding
1. Rolling Shelves That Bring the Back of the Pantry to You
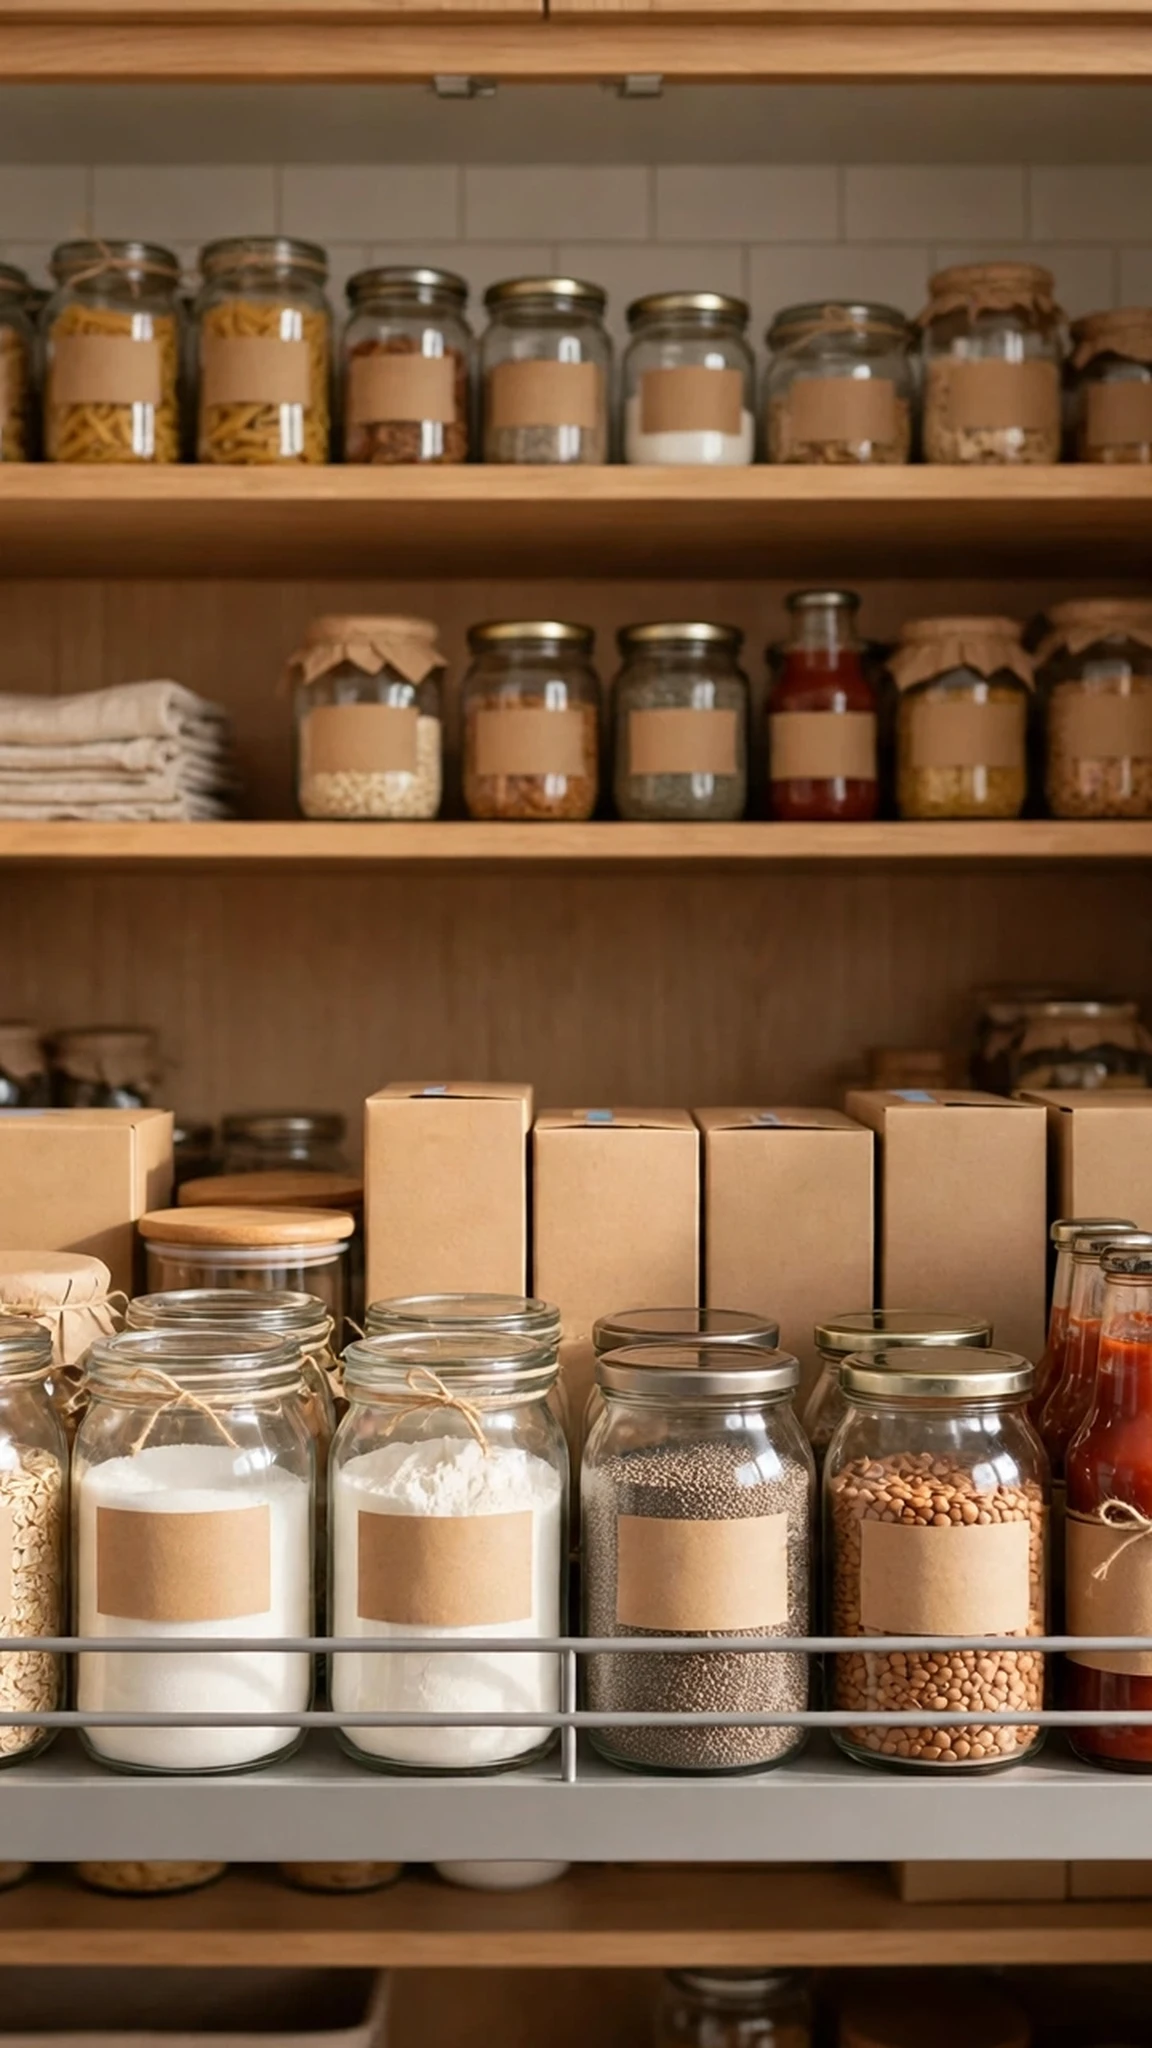
A deep pantry cabinet only works if you can see what is at the back, and full-extension rolling shelves fix that in one pull. Instead of reaching past the front jars and guessing, you slide the whole shelf toward you and scan breakfast, baking, or sauces in a single look, which also stops you from buying a second jar of something you already own. Measure the cabinet interior and the door opening before ordering, because a shelf that is a fraction too wide will catch every time, and keep heavy tins and bottles low so the shelf glides rather than drags.
- Styling tip: Group each shelf by use, such as breakfast on one and sauces on another, so you only pull out the shelf you need.
- What to avoid: Loading a rolling shelf with heavy bulk packs at the top, where it becomes hard to pull and harder to stop.
2. A Slim Rolling Cabinet for the Gap Beside the Range
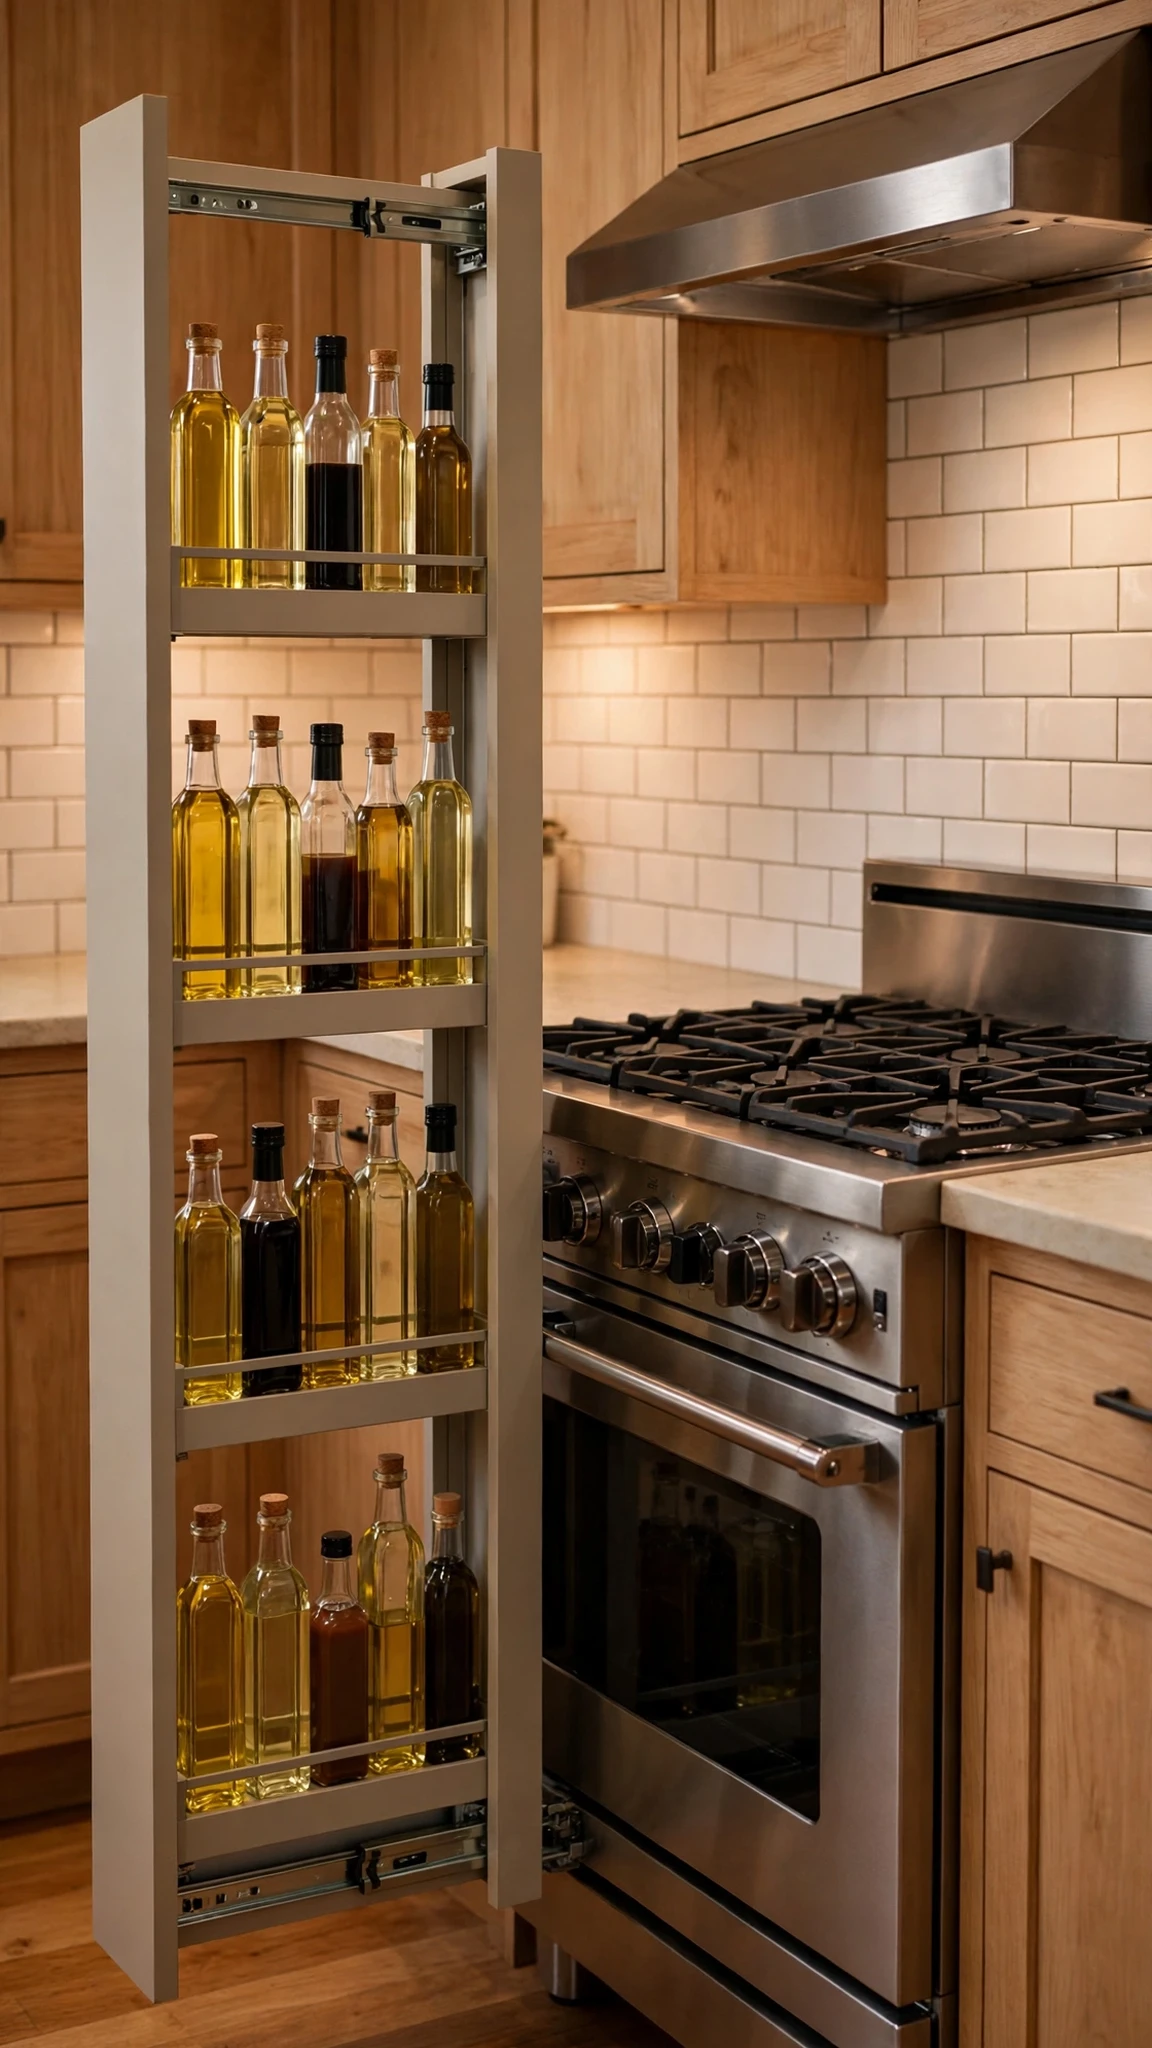
That narrow filler gap beside the range or the fridge is not wasted space; it is just space nobody has claimed yet. A slim full-height pull-out turns it into a neat row for oils, vinegars, and sauces, right where you cook, without taking a single inch from your counters or your main pantry. Keep the bottles tall and narrow with a rail across the front so nothing topples when you pull, and keep the pull-out a little away from direct heat, because oil stored right against a hot oven goes stale faster and feels risky to grab mid-cooking.
- Styling tip: Put the everyday cooking oil and the salt at the front of the pull-out, and the specialty vinegars behind them.
3. A Tall Pull-Out Larder for One-Zone Dry Storage

When dry goods are scattered across four cupboards, nobody remembers where the rice lives, and restocking turns into opening every door in the kitchen. One tall pull-out larder gathers breakfast, baking, and everyday dry goods into a single visible zone, so you can see what is running low while you are already standing in front of it. Adjustable shelves matter here, because cereal boxes and tall flour canisters never match, and keeping the daily breakfast items at eye level means the morning rush does not involve bending down or climbing up.
- Budget-friendly option: If a full larder unit is out of reach, start with one tall cupboard fitted with adjustable shelves and clear containers, and keep everything else as it is.
4. Labelled Containers With a First-In, First-Out Row
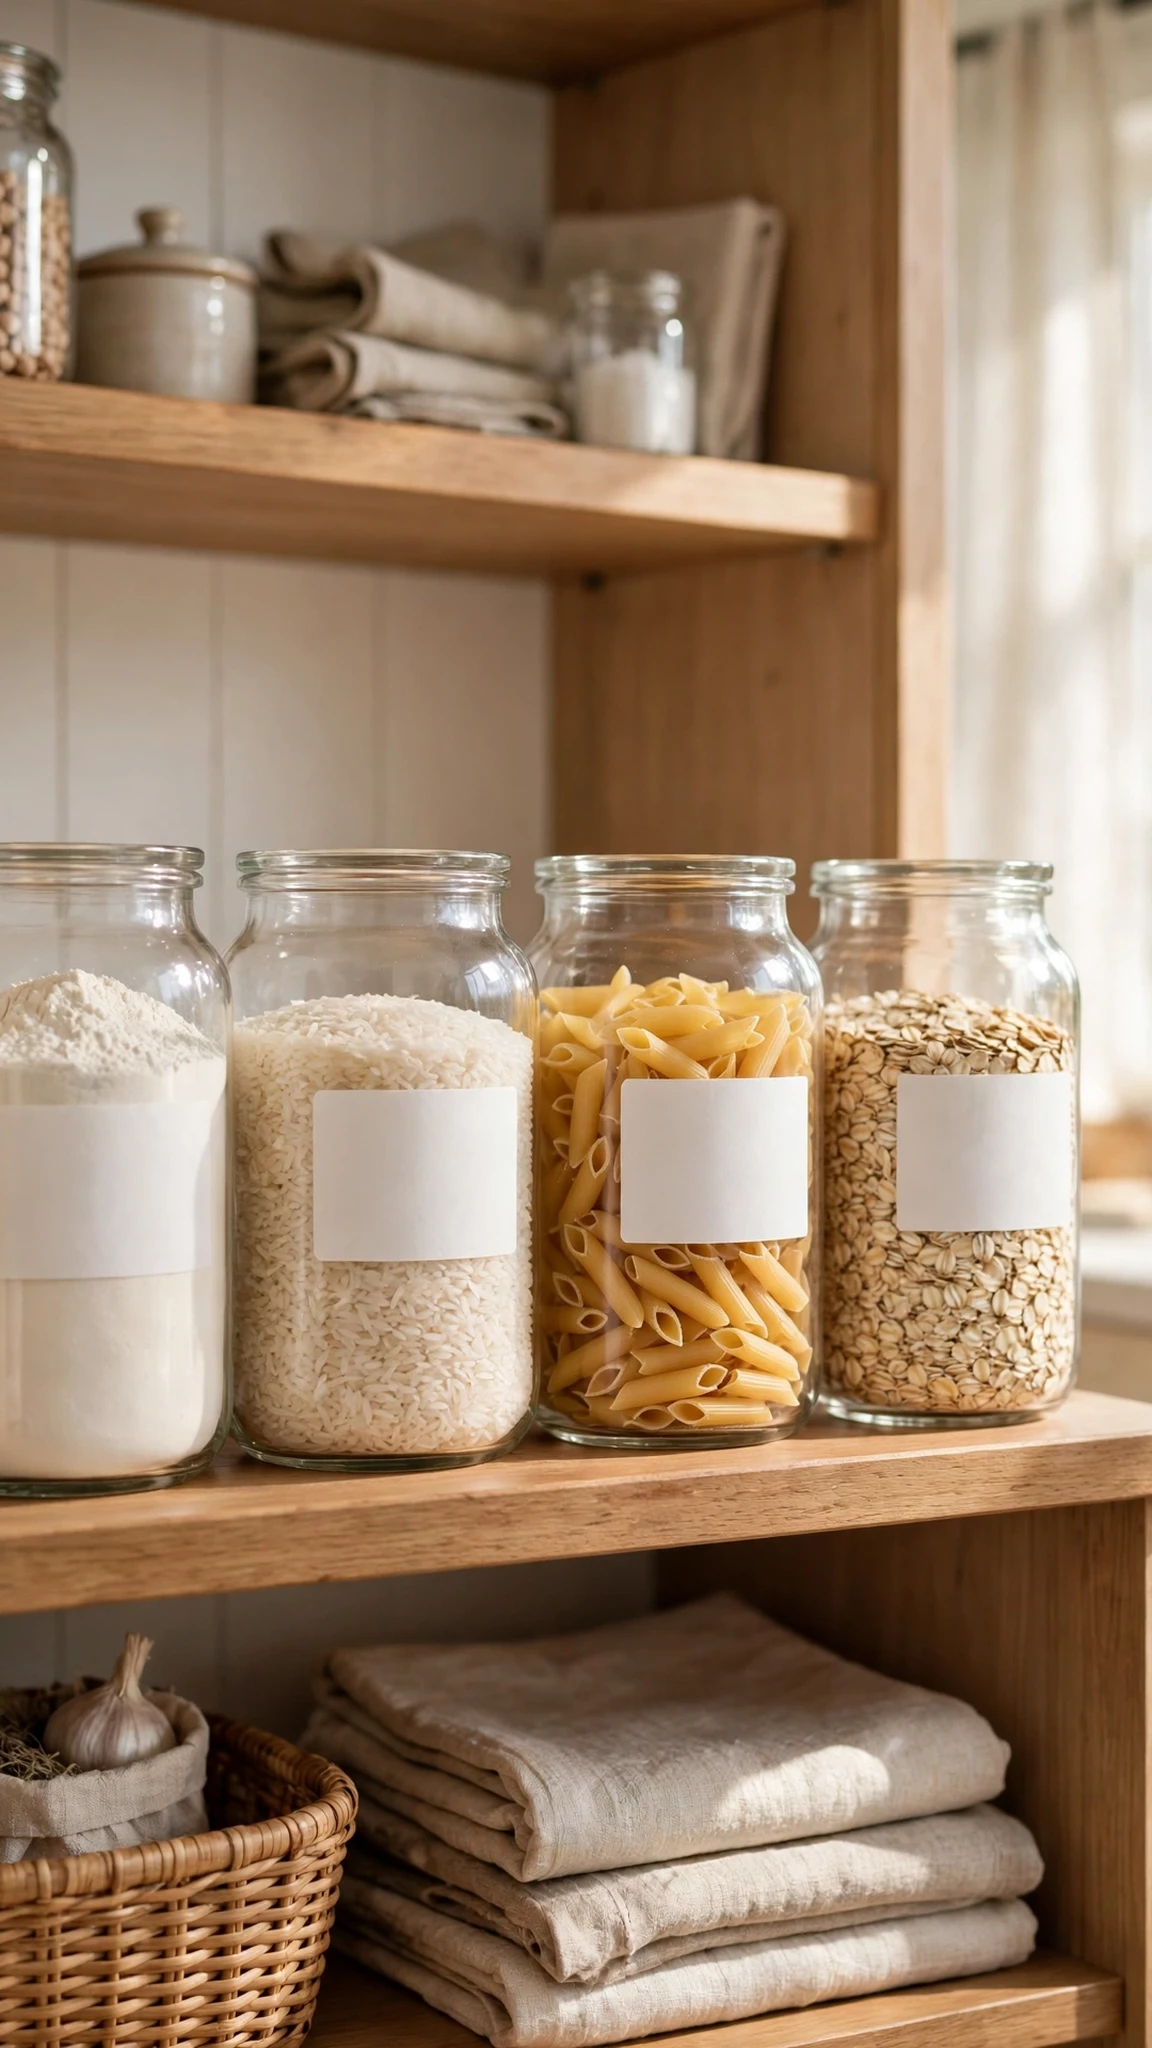
Clear containers only help if you can tell what is inside and which jar to use first, and that is where a simple row order earns its keep. New flour goes behind the older jar, not in front of it, so the older stock gets used before it goes stale, and a small label with the contents and the date stops the mystery-jar problem entirely. Decant only dry goods that suit containers, like flour, rice, pasta, and oats, and leave one small gap at the front of each row, because a row packed tight is a row you will stop maintaining.
- Styling tip: Label the lid as well as the front of the jar, so you can read it when the container is on a high shelf.
- What to avoid: Decanting everything at once on a Sunday, then finding half the containers still empty and unlabeled a month later.
Drawers That Work Harder
5. Deep Cookware Drawers With a Lid File

Pots and pans belong low, where their weight is easy to lift, and deep base drawers suit them far better than a low cupboard you have to crouch into. The trick is what happens to the lids, because a lid stacked under three pans is a lid you will stop using. An upright lid file in the same drawer run keeps lids standing like books, visible at a glance, while the pans lie flat below or beside them, and suddenly grabbing the right lid takes two seconds instead of a noisy rummage.
- Styling tip: Measure your widest lid before buying a divider, and keep the heaviest pan in the lowest drawer.
6. A Flat Spice Drawer With Labels You Can Read at a Glance
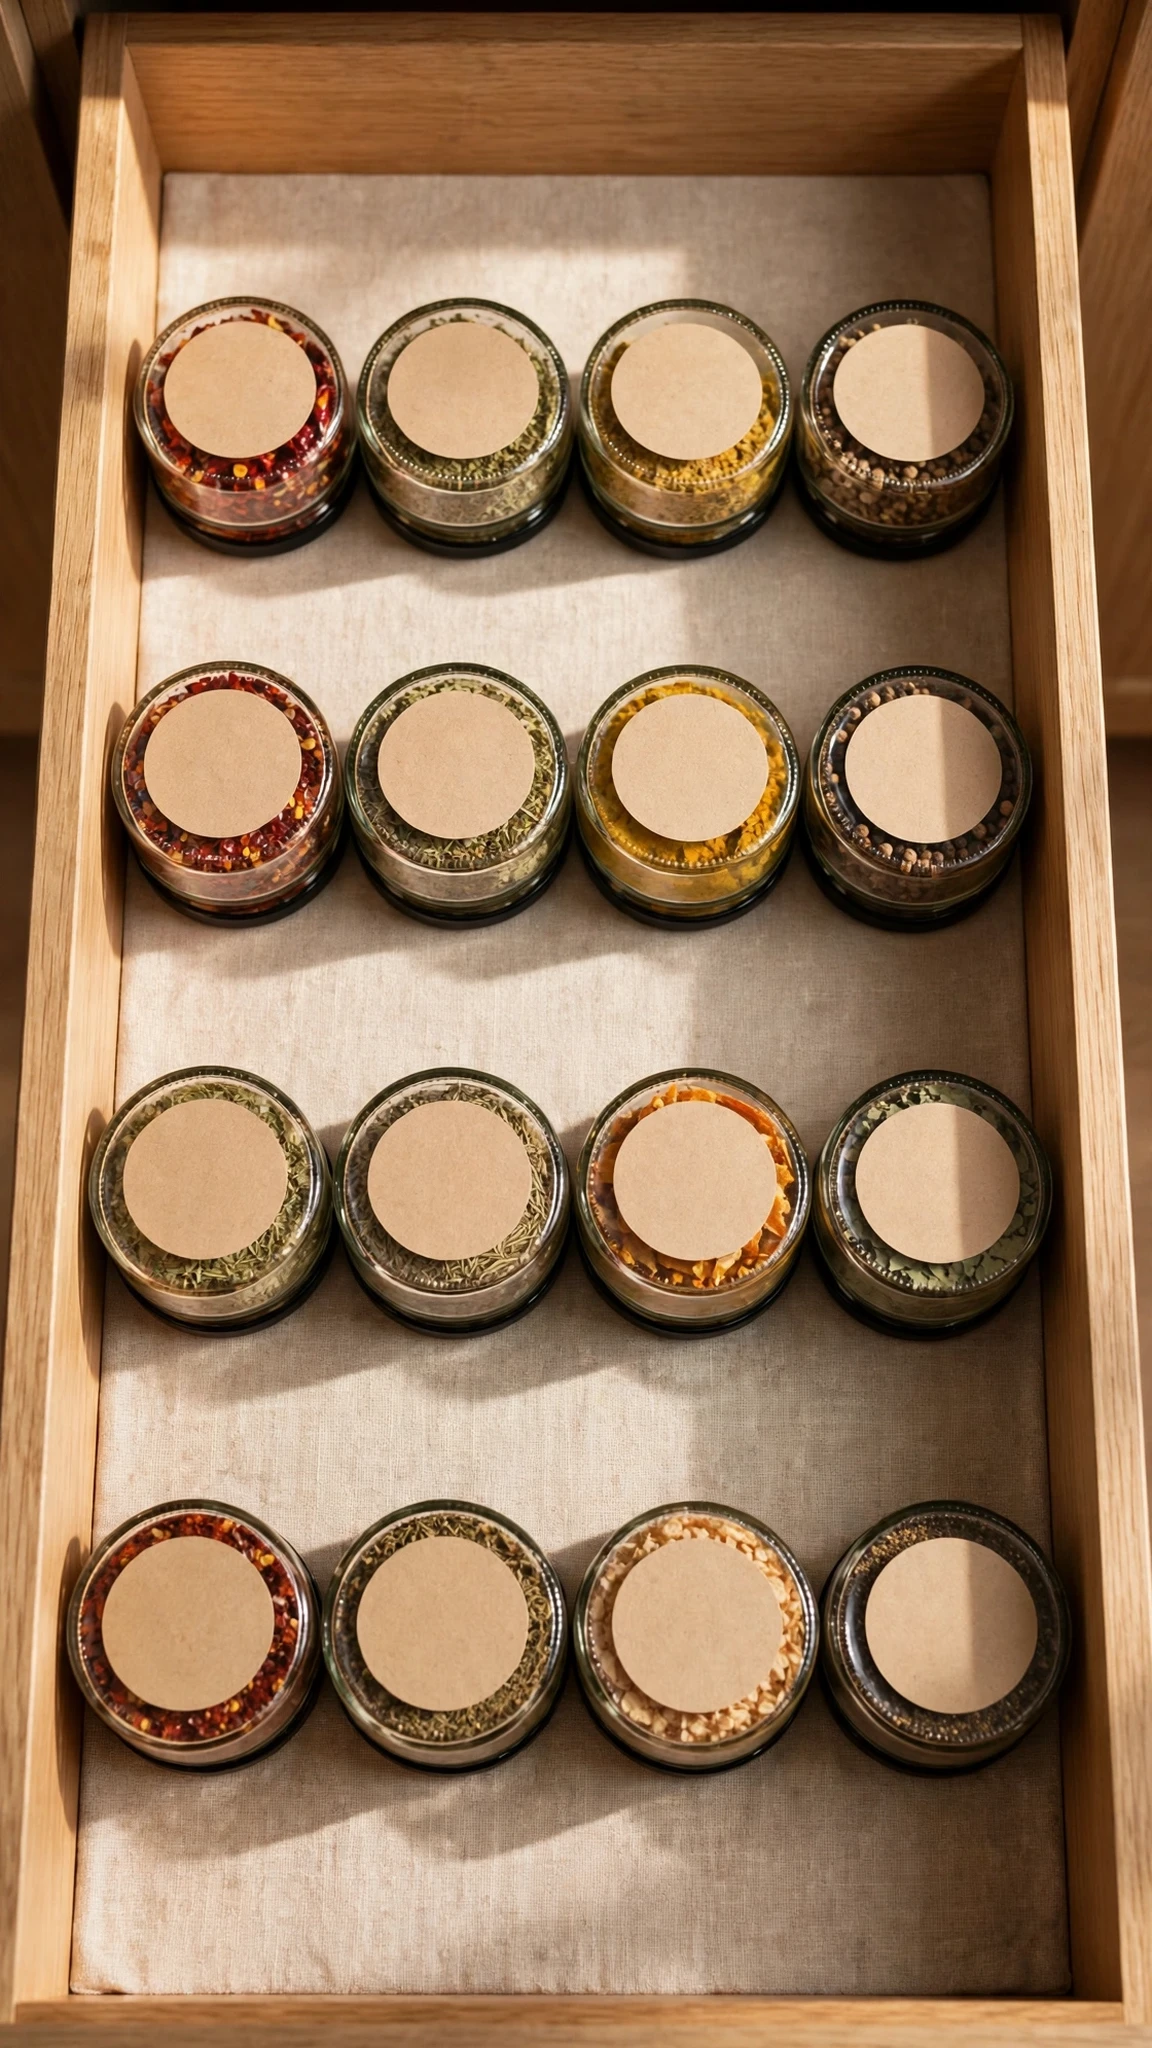
Spices hidden behind each other in a cupboard are spices you forget, and a shallow drawer with angled inserts turns choosing into a single glance. Jars lie flat with their labels facing up; the everyday cumin and paprika sit at the front, and the specialty blends wait behind, so you are not lifting six jars to find the seventh. Matching jars help, but they are not essential, and a small date written on the base of each jar tells you honestly when a spice has lost its flavour and should be replaced.
- Styling tip: Keep the spice drawer near the cooking zone, not across the kitchen, so you reach it without putting down a hot pan.
- Budget-friendly option: A simple angled insert in an existing shallow drawer does the job, with no need for a new drawer unit.
7. A Two-Level Utensil Drawer With a Knife Slot

One jumbled utensil tray is where knives hide under peelers and good spatulas go missing, and a two-level drawer sorts that out without adding a single new cupboard. Small daily tools sit in the shallow top tray, larger spatulas, tongs, and serving spoons get the deeper level below, and knives have their own fitted slot, safely separated instead of loose in the mix. It is a small change, but it changes how the drawer feels every time you open it, because nothing sharp surprises your hand anymore.
- What to avoid: Dropping a knife into the general tray “just for now”, because that is exactly how the drawer goes back to chaos.
8. A Drawer Within a Drawer for Small Tools

Small kitchen tools have a habit of sinking to the bottom of a deep drawer, under the rolling pin and the big serving spoons, and a shallow inner drawer gives them their own floor. Clips, measuring spoons, bottle stoppers, and spare parts sit in the upper level, the larger tools stay below, and both levels close cleanly because the inner drawer is deliberately shallow. Once a month, tip the inner drawer out and pull the duplicates, because that is where the third garlic press and the spare corkscrew quietly accumulate.
Corners, Doors, and Awkward Spaces
9. A Swing-Out Corner System for Pots You Actually Reach
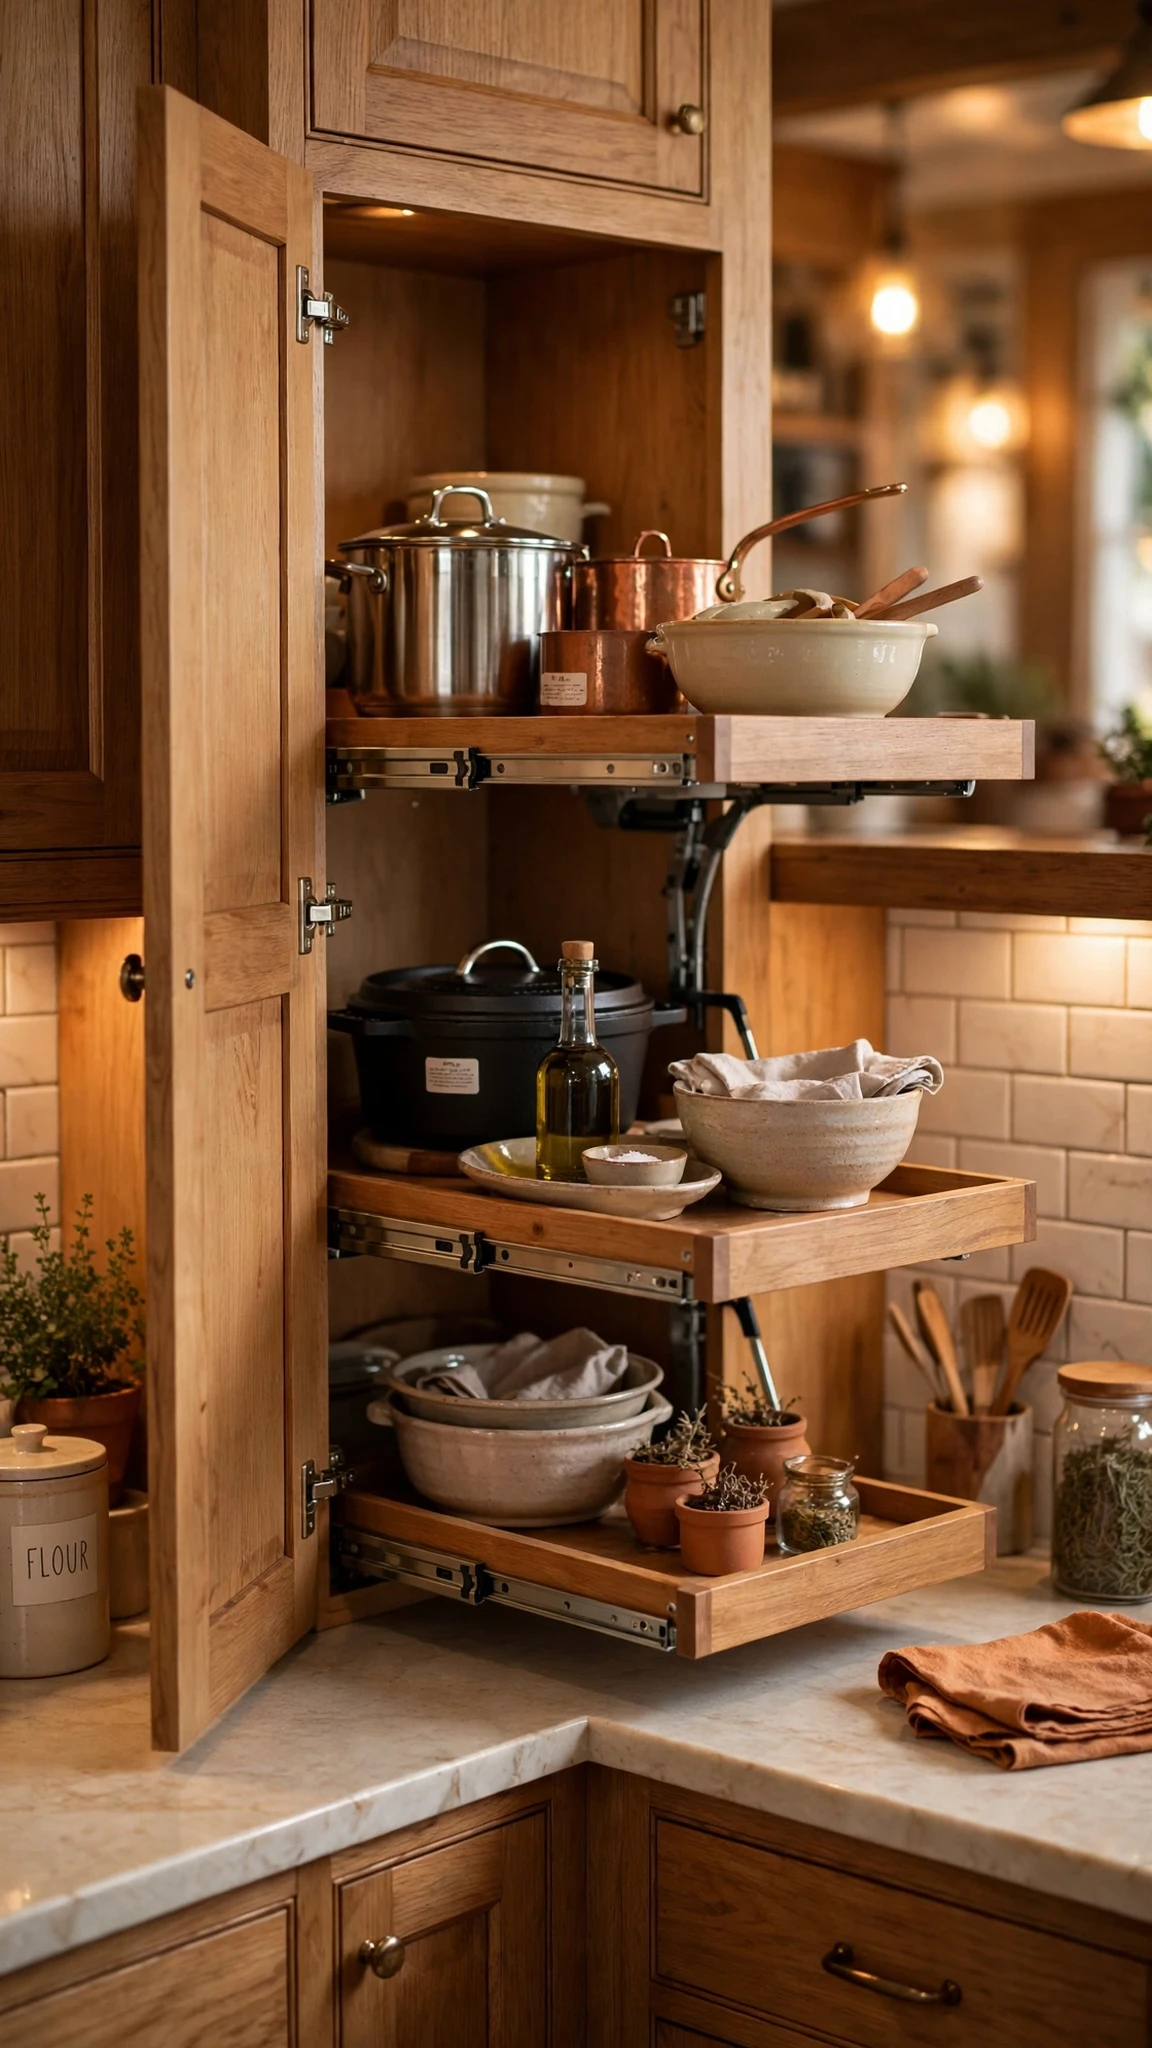
Blind corners are where good pots go to be forgotten, and a swing-out system works because the shelf itself comes out to meet you. Instead of kneeling and reaching into the dark back of the cabinet, you pull the shelves forward to the opening and pick up the pot you want, which means the corner finally holds things you use weekly rather than things you gave up on. Reserve it for larger items, check the door swing and the shelf clearance before fitting, and do not overload the shelves, because a corner system that sags is worse than one you never had.
- Styling tip: Keep daily pans out of the corner entirely, and give it the roasting tin, the large stockpot, and the serving dishes you reach for weekly.
10. Upright Slots for Trays, Boards, and Lids
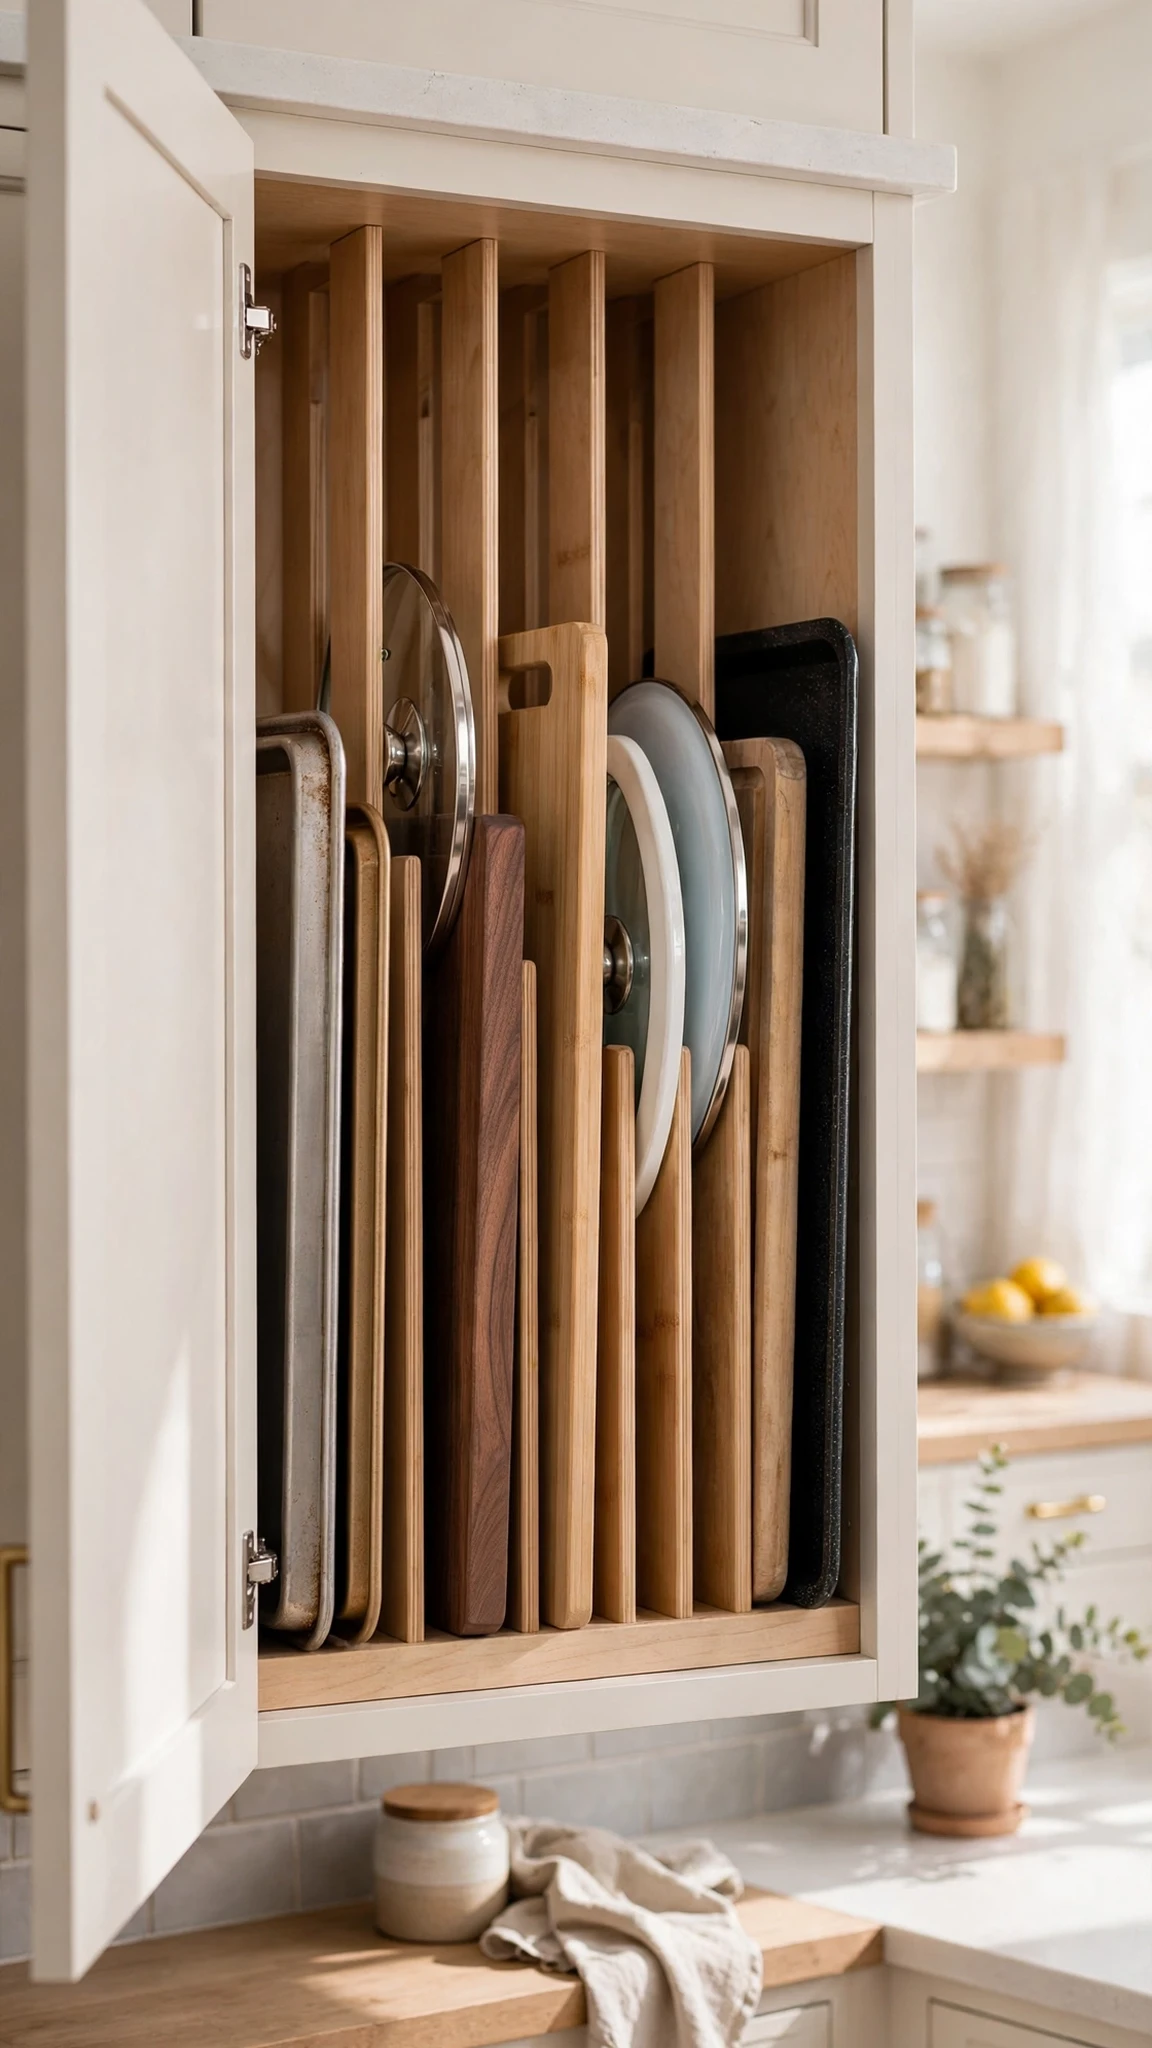
Stacked baking trays are a small daily annoyance with a simple fix, because filing them upright means you can slide out the bottom tray without lifting the whole pile. Narrow vertical slots inside a tall or base cabinet hold trays, cutting boards, and large lids like files, each one reachable on its own, and the heaviest roasting pan sits on the lowest slot where it is safest to lift. Put the slots near the oven or the prep area, size them for your largest board, and the tray hunt disappears from your cooking routine.
11. Slim Racks on the Inside of Cabinet Doors

The inside of a cabinet door is space you already own, and a slim rack turns it into a shallow shelf for the light things you reach for often. Measuring spoons, wraps, a small towel, or a few spice bottles fit neatly, and the door still closes fully if you keep the rack light and check the hinge load first. This is not the place for heavy bottles or cleaning sprays, and food doors should stay separate from cleaning doors, but for everyday small items it is one of the cheapest upgrades that actually gets used.
- What to avoid: Filling every door in the kitchen with racks, which makes doors heavy, hard to close, and quick to sag.
Sink, Waste, and Countertop Calm
12. A Pull-Out Bin Station Hidden Beside the Sink

Waste belongs where the mess is made, and a pull-out bin station beside the sink or prep area means peelings and packaging go straight into a hidden bin instead of across the kitchen to a freestanding one. Separate bins for waste and recycling fit inside one pull-out cabinet, the kitchen floor stays clear, and the bin itself stops being a visual feature of the room. Put the station near the sink and dishwasher, choose a liner size that fits without bunching, and the cleanup after cooking gets noticeably shorter.
13. A Fitted Organizer That Works Around Sink Pipes
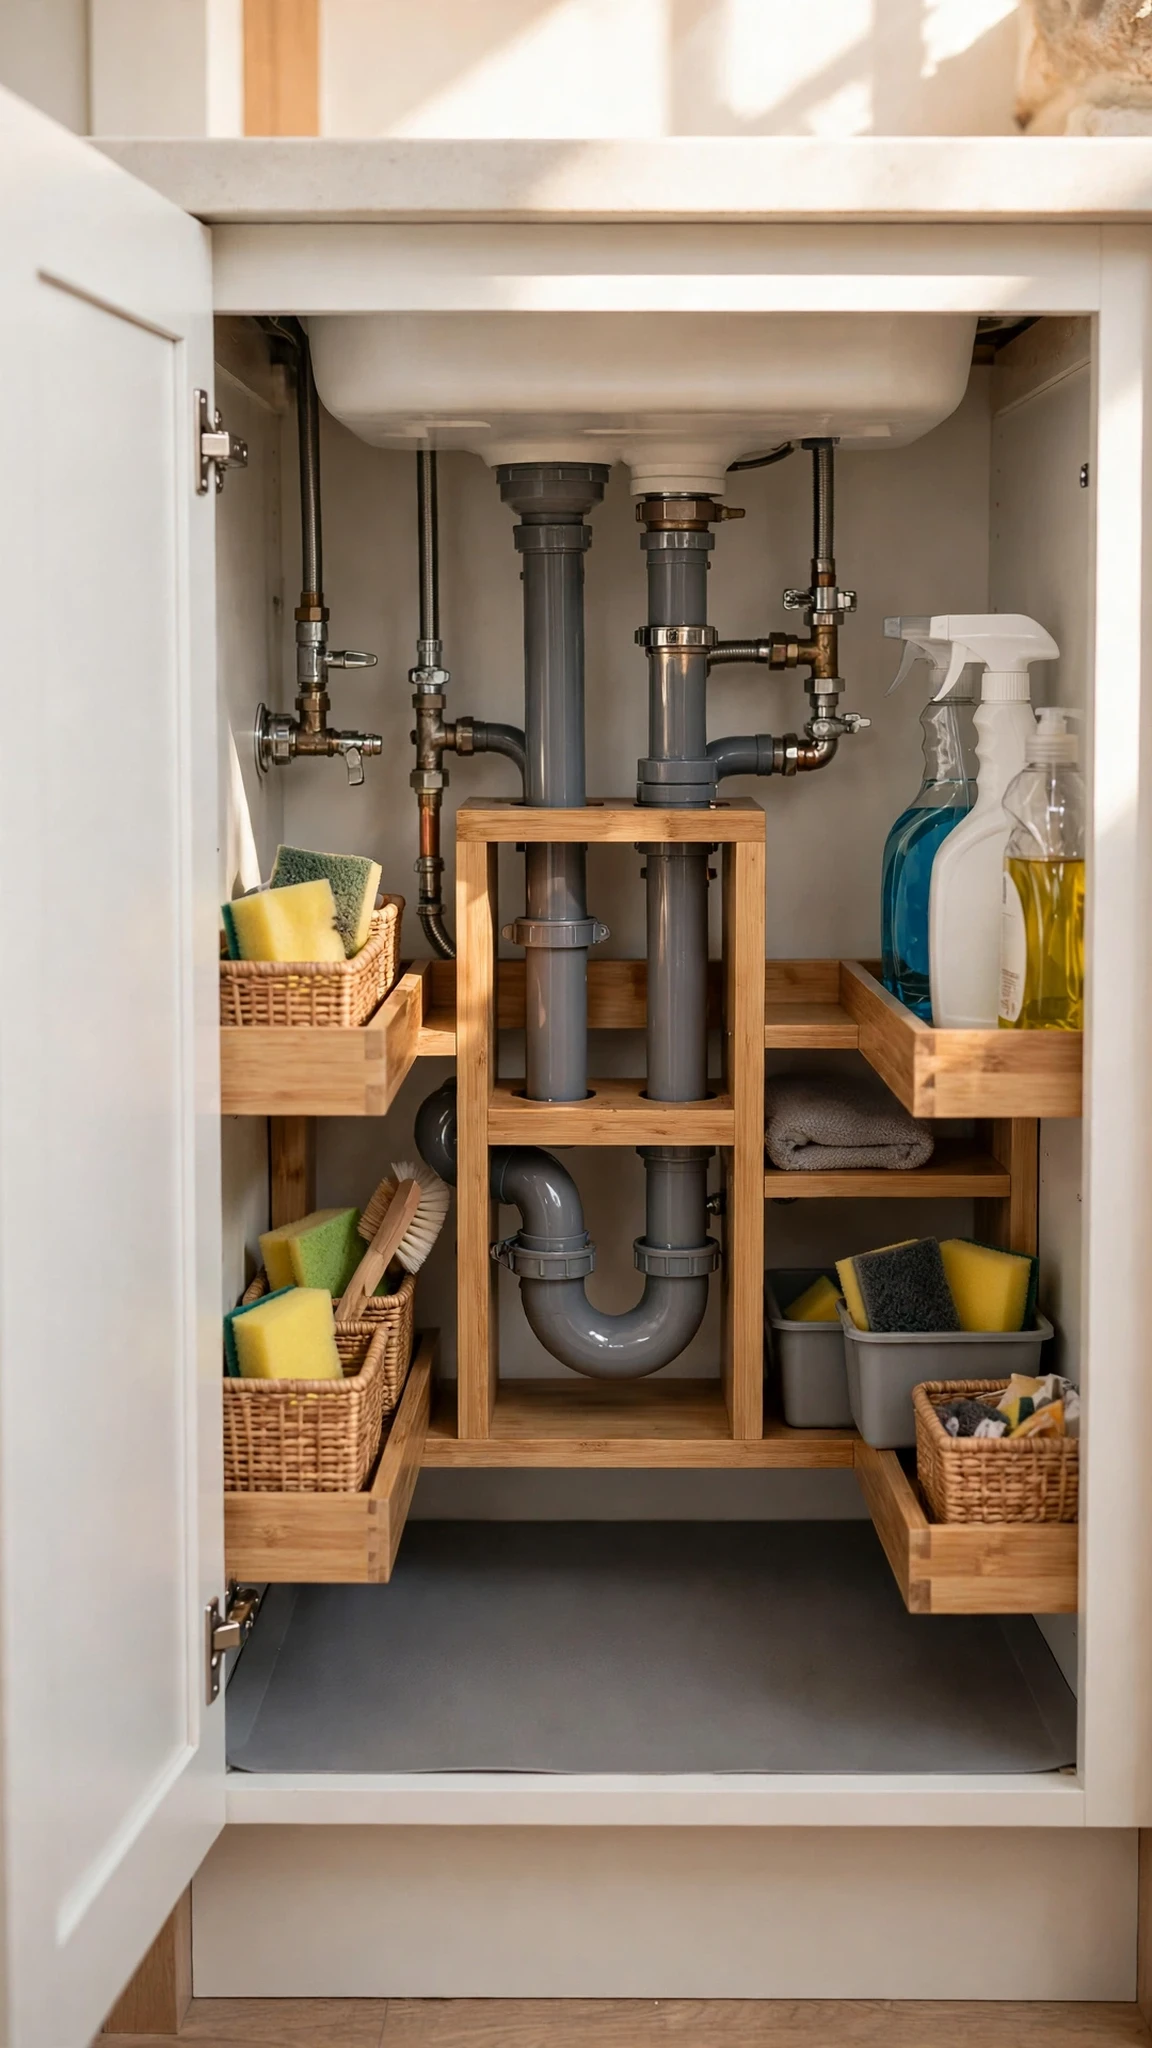
Under the sink is usually a tangle of bottles shoved around pipes, and a fitted organizer works because it is shaped around the plumbing instead of pretending the pipes are not there. Adjustable tiers and small bins use the space beside and below the pipes, cleaning supplies get a visible home, and the pipes stay reachable when you need them, which matters the one time something leaks. Measure the pipe positions first, keep cleaning products away from food storage, and add child-safe closures if little hands can reach the cabinet.
- Styling tip: Keep a small bin just for sponges and brushes, so they stop ending up in a damp pile at the back.
14. A Shutter-Front Cupboard That Hides Daily Appliances
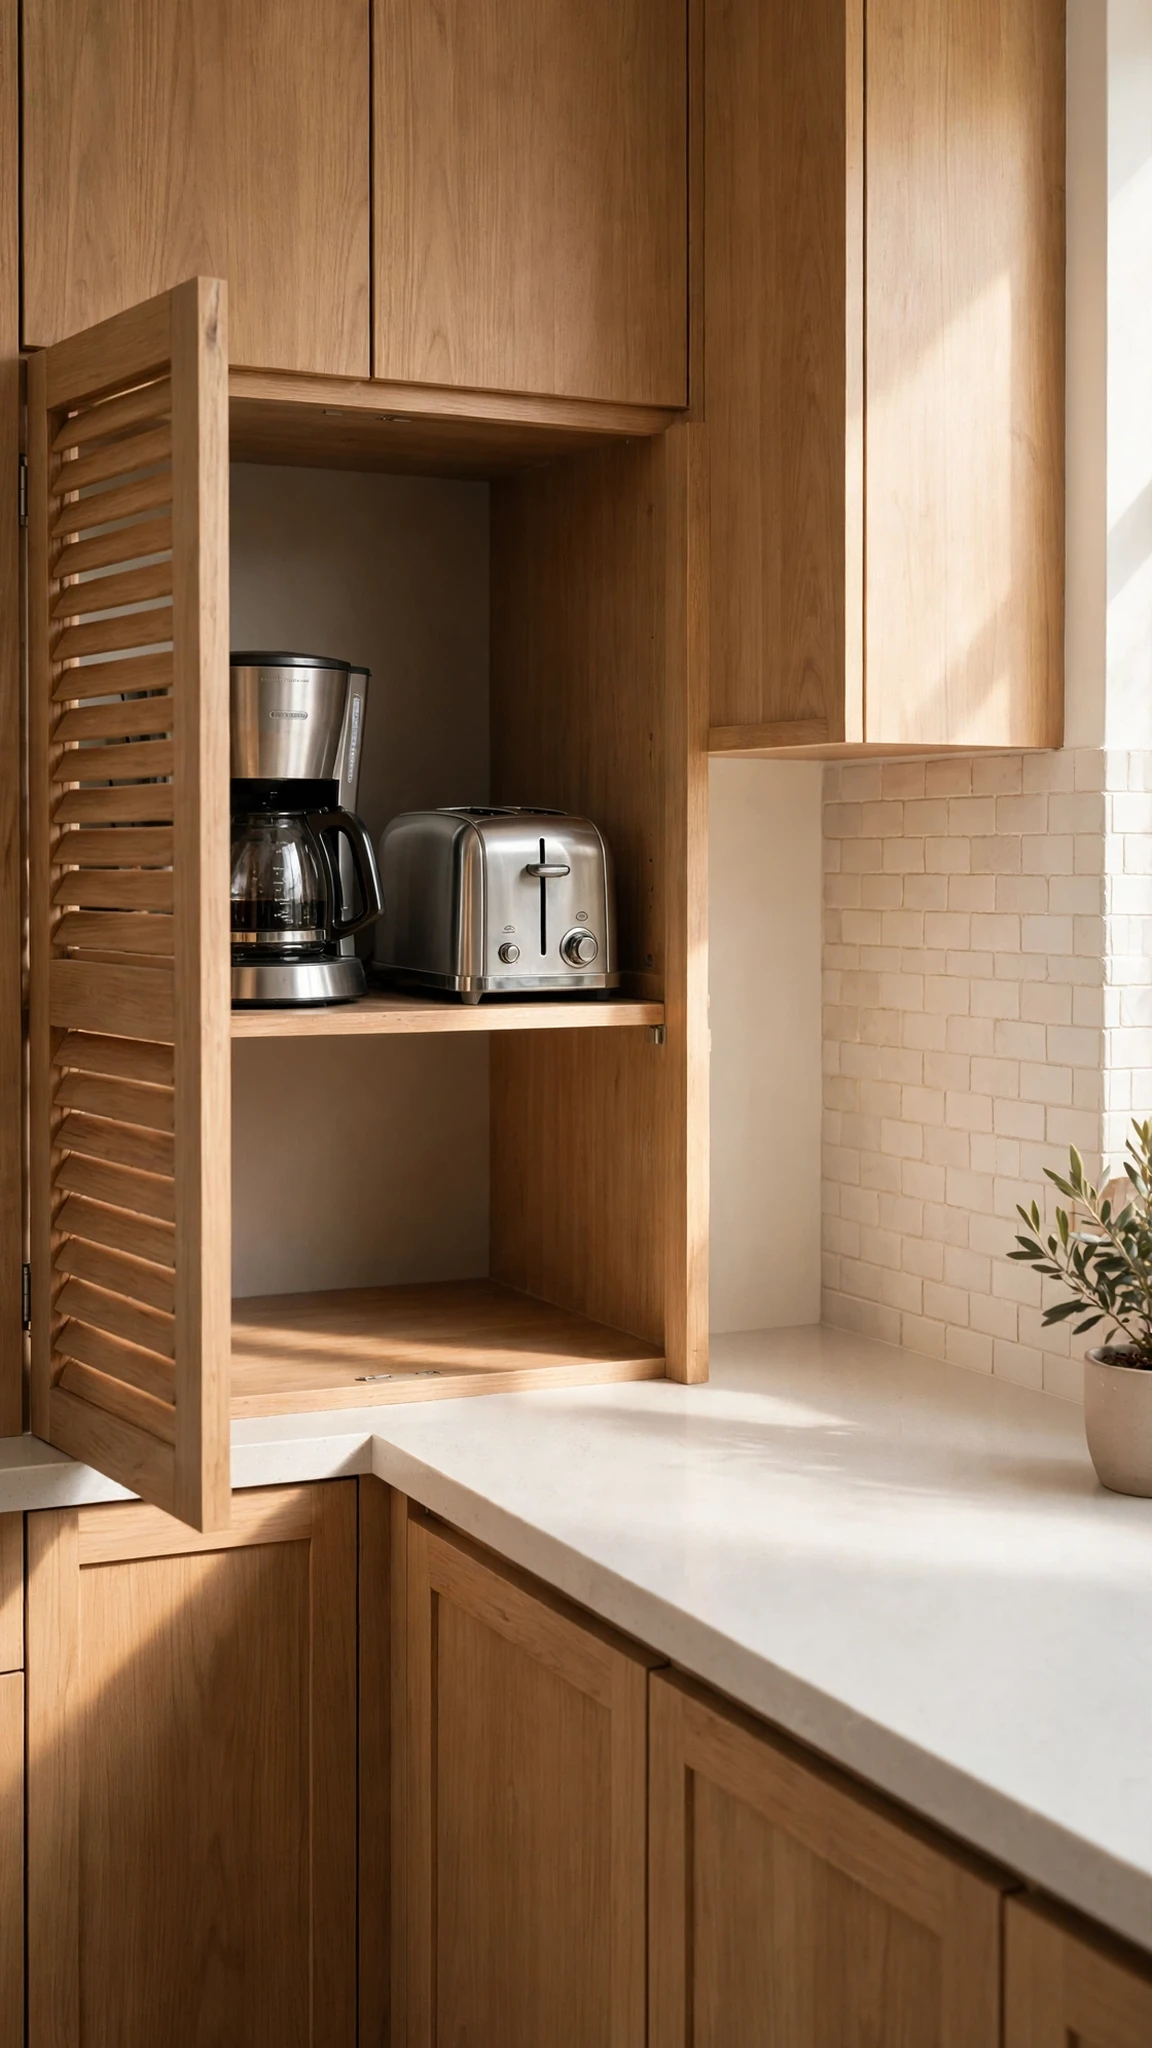
The toaster and coffee maker earn their counter space every morning, but they do not need to sit out all day, and a shutter-front or pocket-door cupboard at counter height solves both problems at once. Appliances stay plugged in and ready inside, the door rolls or folds shut, and the counter looks clear again, which makes the whole kitchen feel calmer without moving a single appliance to another room. Measure with cords, handles, and lids attached, leave room for ventilation around anything that gives off heat, and keep the rarely used gadgets elsewhere.
- What to avoid: Measuring only the appliance body, then finding the cord or the lid stops the door from closing.
15. A Toe-Kick Drawer for Flat Items Under the Cabinets
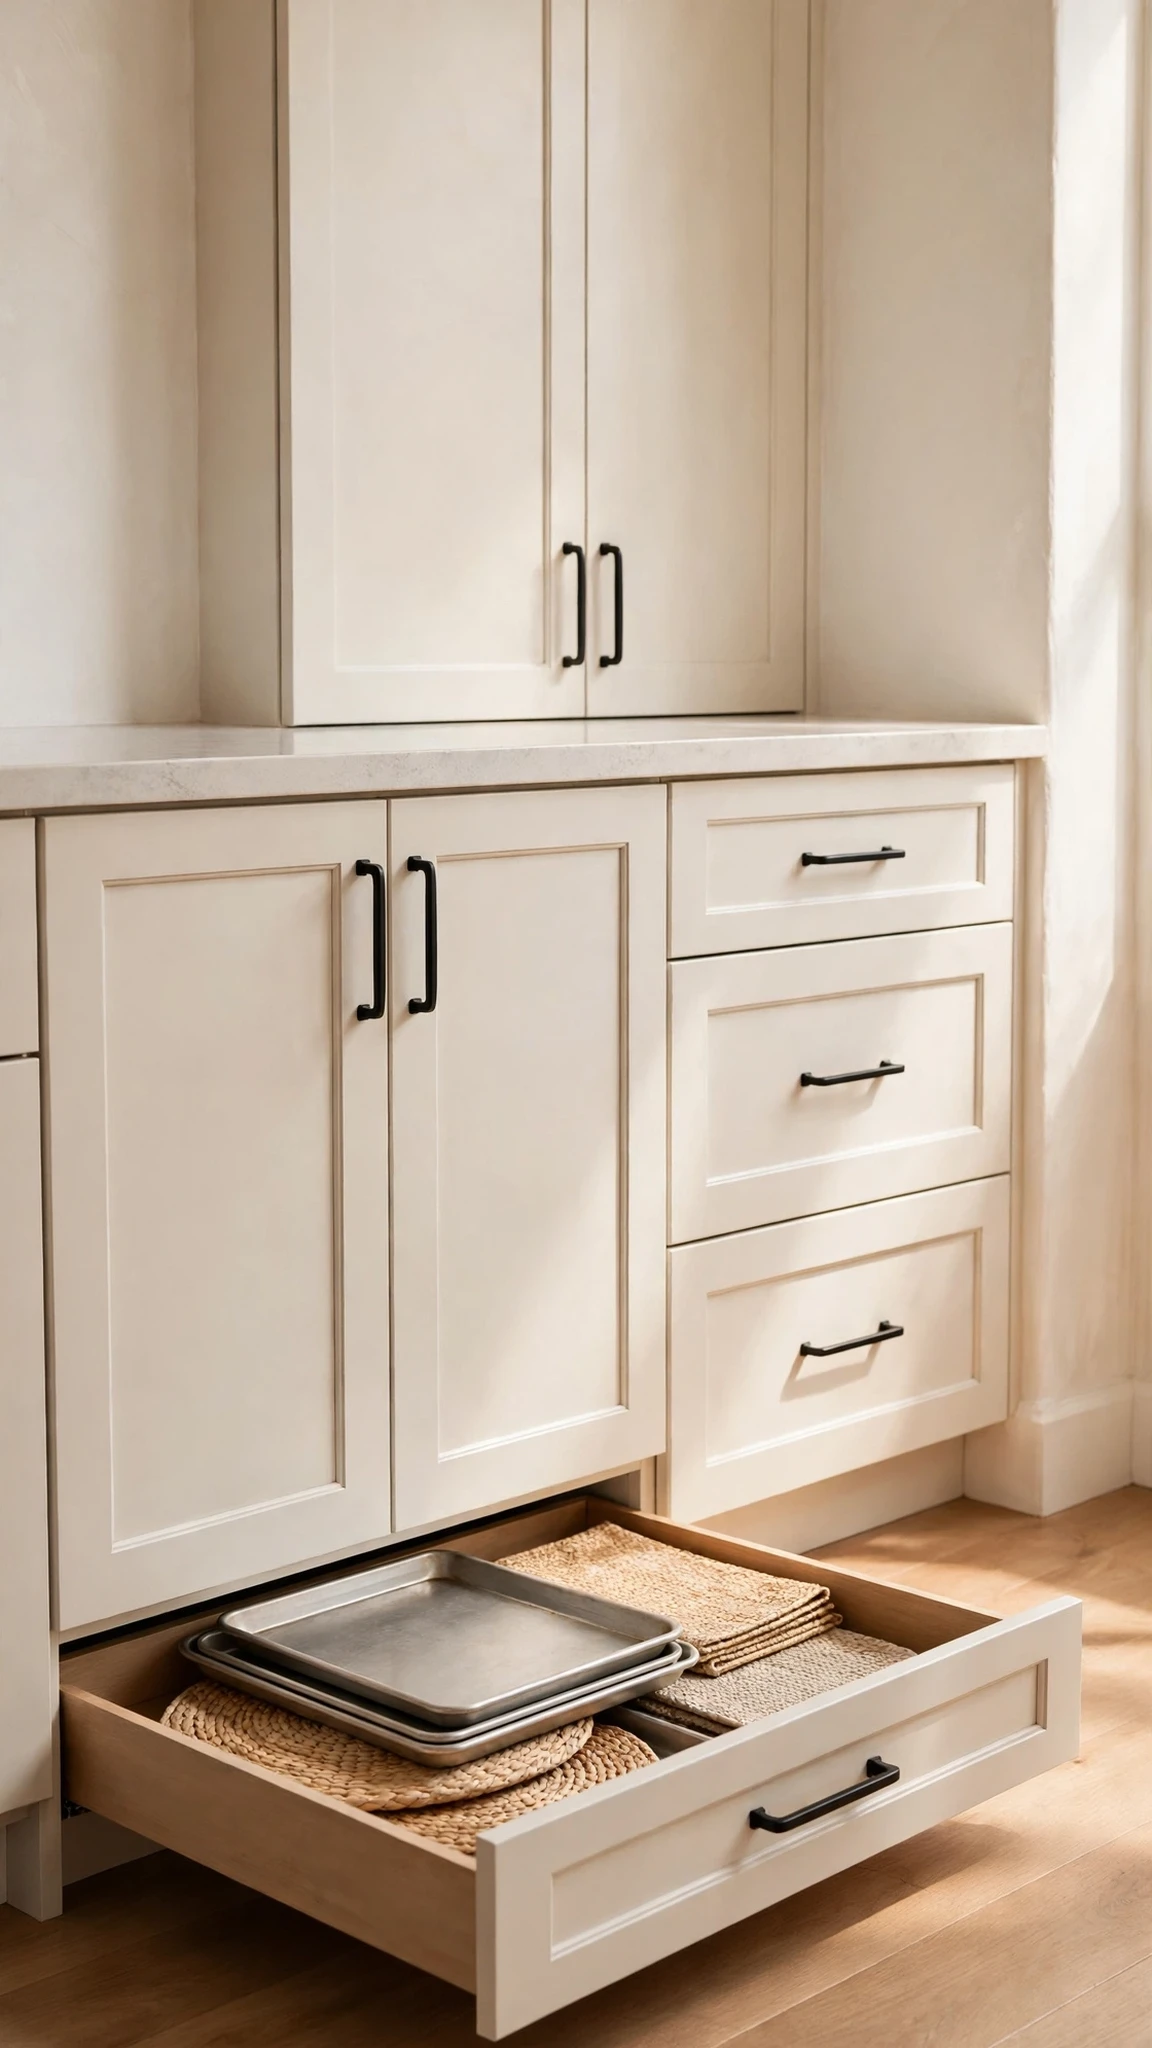
Under every base cabinet there is a recessed strip of space that most kitchens never use, and a shallow toe-kick drawer turns it into a hidden home for flat things. Baking sheets, placemats, and a folding step stool fit neatly, and the drawer adds storage without taking any counter or cabinet area at all, which is rare in a small kitchen. Keep it shallow and light, check for plumbing and wiring before fitting, and save it for flat items that are awkward everywhere else rather than for heavy pans that belong in a drawer.
FAQS
Which kitchen storage upgrade should I do first?
Start with the cabinet that annoys you most, usually the pantry or the drawer that turns into a rummage every day. Fix one zone properly, measure before you buy anything, and only then move to the next cabinet. One working zone beats five half-finished organizers every time.
Can I add pull-out shelves to existing cabinets without remodelling?
Yes, in many cabinets, using retrofit runners and shelves cut to your cabinet’s inside width. Measure the interior, the door opening, and the door swing first, and check that the shelf supports can hold the weight. A weekend retrofit suits most standard base and pantry cabinets well.
How do I organize a blind corner cabinet?
Fit a swing-out or carousel system so the back of the cabinet comes forward to the opening. Keep large items you use weekly there, such as pots and serving dishes, and keep daily pans out of the corner entirely. Avoid overfilling the shelves, or the system becomes hard to pull.
What is the best way to store pots, pans, and lids?
Store pans in deep base drawers, with the heaviest pan in the lowest drawer, and stand lids upright in a lid file in the same drawer run. Avoid stacking more than two pans together, and measure your widest lid before buying a divider so every lid has a slot.
How can I hide small appliances without losing counter space?
Use a shutter-front or pocket-door cupboard at counter height, with appliances plugged in and ready inside. Measure each appliance with its cord, handle, and lid attached, and allow ventilation for anything that gives off heat. Store rarely used appliances in a different cupboard.
How do I keep spices visible and fresh?
Use a shallow drawer with angled inserts so jar labels face upward and the whole collection can be scanned at a glance. Group everyday spices at the front, keep specialty blends behind, and write a replacement date on the base of each jar so stale spices get replaced on time.
Are deep drawers better than lower cabinets?
For heavy and bulky items, yes, because the contents slide out to you instead of forcing you to crouch and reach into a dark cupboard. Lower cabinets still suit tall items and cleaning supplies under the sink, where a drawer would not fit around the pipes.
Final Thoughts
The calmest kitchens are not the ones with the most organizers; they are the ones where every item has one visible home and the daily annoyance has been fixed first. Pick the two or three upgrades that match your own kitchen, whether that is a pantry shelf that slides forward, a drawer that finally holds its lids, or a counter that clears at the end of the day, and measure before you buy anything. Start with one zone, keep it tidy with a simple habit like returning lids to their file and rotating jars forward, and let the rest of the kitchen follow at its own pace.
Your next step is small and practical, so take it today: walk the kitchen, open the cabinet you avoid most, and note what is actually wrong with it. Is it too deep, too dark, too stacked, or just too full of things that belong elsewhere? That one answer tells you which upgrade to buy first, and it keeps the whole project honest, because you are fixing your kitchen, not copying someone else’s.